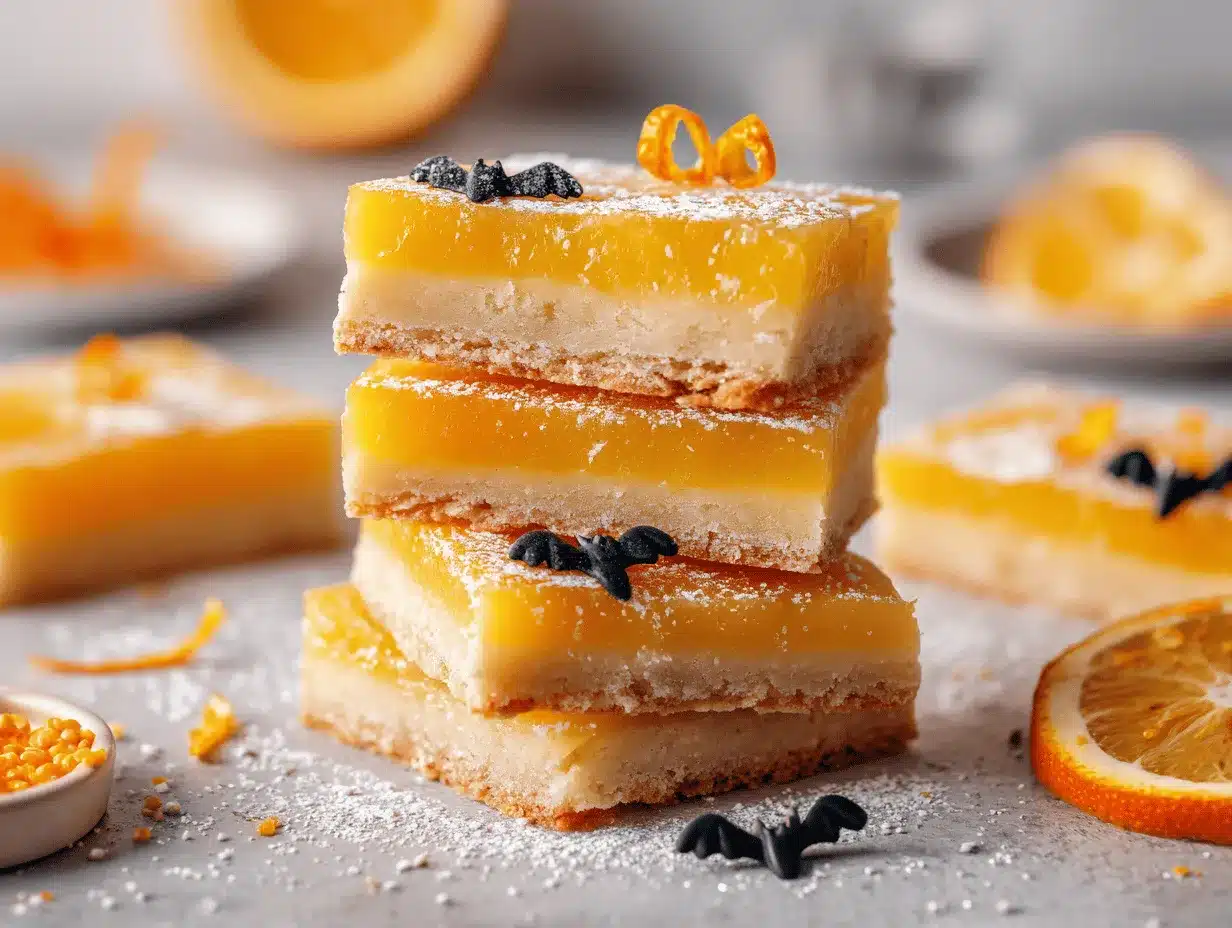
The first time I pulled a tray of these orange Halloween lemon bars out of the oven, my kitchen was filled with a citrusy aroma so bright and cheerful—honestly, it made me forget about the autumn chill outside. There’s something almost magical about the way these bars blend the tang of lemon with a playful burst of orange, then get topped off with festive sprinkles that sparkle like tiny costumes at a Halloween party. As a longtime baker (and Halloween enthusiast), I’ve always loved recipes that bring folks together, and this one does just that—especially when you set out a plate for trick-or-treaters or a spooky movie night.
I’ll admit, my obsession with citrus desserts started years ago when my grandmother taught me how to zest an orange without grating my knuckles (a skill I still treasure). But these orange Halloween lemon bars are a twist I came up with during one of those “what if?” moments in the kitchen. The tart lemon filling, mellowed by sweet orange juice, sits on a buttery shortbread base, and the sprinkles? Well, they’re just plain fun. Perfect for kids and grown-ups alike, especially when you want something easy yet eye-catching for Halloween.
This recipe is one I’ve tested over and over, tweaking the ratios so you get that perfect balance of tangy and sweet. If you’re looking for a treat that delivers bold flavors, a cheerful pop of color, and just enough nostalgia to make you smile, these orange Halloween lemon bars are it. Whether you’re a busy parent hoping to surprise the kiddos or just someone who loves a good citrus dessert, you’re in for a treat. Trust me—these bars will quickly become a holiday tradition in your house!
Why You’ll Love This Recipe
Let’s face it—everyone wants that one dessert that gets folks talking, and these orange Halloween lemon bars do exactly that. After many (many!) test batches, I can confidently say this recipe is reliable, fun, and just a little bit whimsical. Here’s why you’ll love making them:
- Quick & Easy: You can whip up these bars in under an hour, making them perfect for last-minute Halloween parties or when you just need a sweet pick-me-up.
- Simple Ingredients: Nothing fancy here—most items are probably already hanging out in your kitchen. No need for hard-to-find specialty products.
- Perfect for Celebrations: These are a hit at school bake sales, Halloween gatherings, or as a fun surprise for the family after dinner. The sprinkles add instant festive vibes!
- Crowd-Pleaser: Kids love the bright colors and sweet-tart flavor, while adults appreciate the classic lemon bar texture with a citrusy twist.
- Unbelievably Delicious: The combination of orange and lemon is refreshing yet comforting. The shortbread crust is buttery and melts in your mouth, and the filling is creamy and zesty.
What sets this orange Halloween lemon bars recipe apart is the way the orange juice and zest brighten up the traditional lemon bar, making each bite more layered and interesting. Blending the citrus together (instead of just using lemon) gives the bars a softer tang and a sunny orange hue—so pretty that everyone asks, “How did you get them so orange?” Plus, the sprinkles add a playful crunch and make these bars stand out on any dessert table.
Every time I bake these, someone ends up sneaking a second piece (or third—no judgment here), and the compliments keep rolling in. It’s the kind of treat that turns an ordinary day into something special, especially when you want to celebrate without making things complicated. If you love classic lemon bars but crave something a little more festive, these are a guaranteed win.
What Ingredients You Will Need
This orange Halloween lemon bars recipe uses a handful of pantry staples, along with some fresh citrus for a lively flavor and eye-catching color. Here’s what you’ll need (and a few tips from my own kitchen):
- For the Shortbread Crust:
- All-purpose flour (180g) – gives structure and a tender crumb
- Unsalted butter, softened (115g / 1/2 cup) – adds richness; I like using Kerrygold for extra flavor
- Powdered sugar (60g / 1/2 cup) – for a delicate sweetness and a smooth texture
- Salt (1/4 tsp) – balances the flavors
- Orange zest (from 1 orange) – infuses the base with subtle citrus
- For the Orange Lemon Filling:
- Large eggs (3) – room temperature works best for a smooth filling
- Granulated sugar (200g / 1 cup) – sweetens and helps set the filling
- All-purpose flour (30g / 1/4 cup) – thickens the filling, so it holds its shape when cut
- Lemon juice (60ml / 1/4 cup) – fresh squeezed for maximum tang
- Orange juice (60ml / 1/4 cup) – use freshly squeezed for best color and flavor
- Orange zest (from 1 orange) – amps up the citrusy aroma
- Lemon zest (from 1 lemon) – optional, but really brightens the filling
- Orange food coloring (optional, a few drops) – for a dramatic, Halloween-worthy look
- For the Festive Topping:
- Halloween-themed sprinkles (2-3 tbsp) – I love Wilton’s Halloween mix; choose orange, black, purple, or green for extra pop
- Powdered sugar, for dusting (optional) – adds a snowy finish if you like
Ingredient Tips: For the best citrus flavor, always zest your oranges and lemons before juicing them. If you want a gluten-free version, swap the flour in the crust and filling for a 1:1 gluten-free blend (I’ve tested with King Arthur’s and it works great). You can also use plant-based butter for a dairy-free option. If you can’t find Halloween sprinkles, try crushed orange candies or colored sugar—just as fun!
All in all, these ingredients are easy to find and simple to adapt. The real star here is that orange zest—it makes the bars taste (and smell) like sunshine, even on a chilly October evening.
Equipment Needed
- 8×8-inch (20x20cm) square baking pan – the standard size for classic lemon bars
- Parchment paper or nonstick baking spray – for easy removal (trust me, parchment makes your life easier!)
- Mixing bowls – at least two: one for the crust, one for the filling
- Whisk and spatula – a whisk for silky filling, spatula for pressing crust
- Microplane or fine grater – for zesting citrus (a must-have in my kitchen)
- Measuring cups and spoons – accuracy matters for the filling texture
- Fine mesh sieve (optional) – for dusting powdered sugar evenly on top
If you don’t have a microplane, a regular box grater (fine side) works for zesting, though it’s a bit trickier. No baking pan? You can use a similarly sized oven-safe glass dish. I’ve even tried this in a round cake pan—bars turn out pie-shaped, but still delicious! For budget-friendly gear, check out Wilton or Pyrex—they get the job done without breaking the bank. Just make sure to keep your zester sharp and your pan clean for best results.
Preparation Method
- Preheat the Oven & Prep the Pan: Set your oven to 350°F (175°C). Line your 8×8-inch (20x20cm) baking pan with parchment, leaving some overhang for easy lifting later. Lightly grease if not using parchment. Takes about 5 minutes.
- Make the Shortbread Crust: In a mixing bowl, combine 180g (1 1/2 cups) flour, 115g (1/2 cup) softened butter, 60g (1/2 cup) powdered sugar, 1/4 tsp salt, and zest from 1 orange. Use a spatula or your hands to blend until the mixture looks sandy but holds together when pressed. If it’s too dry, add a teaspoon of cold water. Press firmly into the bottom of your pan, smoothing the top with your fingers. Bake for 18-20 minutes, until edges are lightly golden and the middle is set. (Your kitchen will smell amazing right about now.)
- Prepare the Citrus Filling: While the crust bakes, whisk together 3 large eggs in a separate bowl until frothy (about 1 minute). Add 200g (1 cup) granulated sugar, 30g (1/4 cup) flour, 60ml (1/4 cup) lemon juice, 60ml (1/4 cup) orange juice, zest from 1 orange and 1 lemon, plus a few drops orange food coloring if using. Whisk until smooth and lump-free. If you notice flour clumps, keep whisking—a smooth filling is key for perfect bars.
- Pour & Bake: Once crust is done, remove from oven. Pour the citrus filling over the hot crust (the heat helps the filling set evenly). Return pan to oven and bake for 20-25 minutes, until the filling is just set and barely jiggles in the center. If the edges puff up, don’t worry—they’ll settle as it cools. Let cool completely in the pan—about 1 hour at room temperature.
- Add Festive Sprinkles: Once bars are cool, scatter Halloween sprinkles generously over the top. Press gently so they stick to the surface. If you like, dust with powdered sugar using a fine mesh sieve for extra flair. (If you sprinkle while bars are warm, the colors might bleed—wait for a fully cooled surface.)
- Cut & Serve: Use the parchment overhang to lift bars from the pan. Cut into 16 squares for classic bars or 12 larger rectangles if you want extra hearty pieces. Wipe your knife between cuts for clean edges. Serve on a platter with extra sprinkles if desired.
Troubleshooting Tips: If the filling cracks after cooling, it’s usually from overbaking—pull bars out when the center is barely set. If the crust feels soggy, make sure you bake it fully before adding filling. For efficiency, zest and juice your citrus while the crust bakes. The bars should smell sweet and tangy, with a slight “bounce” when pressed gently.
Personal note: I always save a corner piece for myself—the crust is extra golden there!
Cooking Tips & Techniques
Making perfect orange Halloween lemon bars is all about those small details. Here are my go-to tips for getting them just right, every time:
- Don’t Skip the Zest: Zesting citrus before juicing preserves all those fragrant oils. It’s what gives the bars their depth of flavor. Trust me, skip this and you’ll miss out.
- Room Temp Eggs: Using eggs at room temperature helps the filling set smoothly. Cold eggs can make the filling curdle—learned that the hard way after a fridge mishap!
- Whisk, Don’t Beat: Whisk ingredients gently until just combined. Overmixing introduces air, which can cause the filling to puff and crack.
- Multitasking: While the crust bakes, prep your filling ingredients. This makes the process fast and keeps you organized.
- Check Doneness: The filling should be set at the edges and just barely jiggle in the middle when you give the pan a gentle shake. If it’s too liquid, bake for another 2-3 minutes—just don’t overdo it.
- Sprinkle Timing: Wait until bars are completely cool before adding sprinkles to avoid color bleed. If you want extra crunch, add some sprinkles just before serving.
I’ve had my share of failures—like using old baking powder in the crust (it tasted flat) or forgetting the parchment (bars welded to the pan!). Now, I always double-check ingredients and prep my tools before starting. Consistency comes from following the steps and trusting those visual cues: golden crust, vibrant filling, and a cheerful sprinkle finish. Oh, and don’t worry if your bars aren’t perfectly even—imperfections just mean they’re homemade.
Variations & Adaptations
One of the best things about this orange Halloween lemon bars recipe is how flexible it is. Over the years, I’ve tried plenty of tweaks—some wild, some simple. Here are a few favorite variations to make them your own:
- Gluten-Free: Substitute a 1:1 gluten-free flour blend in both crust and filling. I’ve used King Arthur and Bob’s Red Mill—both work well, though the crust is a bit more crumbly.
- Vegan: Swap butter for vegan margarine and use an egg replacer (like flaxseed meal or aquafaba) for the filling. The texture is slightly softer but still delicious.
- Seasonal Citrus: Try blood orange or Meyer lemon for a twist. Blood orange gives a dramatic red-orange hue, while Meyer lemon is sweeter and less tart.
- Flavor Boost: Add a pinch of ground ginger or cinnamon to the crust for a warm autumn note.
- Nutty Crunch: Sprinkle chopped pistachios or pecans on top with the sprinkles for added texture.
- Cooking Methods: You can bake these in muffin tins for individual servings (reduce bake time by 5 minutes) or as a slab in a larger pan if you need more bars—just adjust ingredient quantities accordingly.
One year, I swapped half the orange juice for tangerine—turns out it’s incredibly fragrant. If you have nut allergies in the family, just leave out any nut toppings. For those who love a super tangy bar, double the lemon zest and juice. Customizing these bars is part of the fun, so don’t be afraid to experiment and share your own twist in the comments!
Serving & Storage Suggestions
These orange Halloween lemon bars are best served chilled or at room temperature. The flavors really pop when the bars have had time to set—usually after a couple of hours in the fridge. Cut them just before serving for sharp, clean edges, and arrange them on a platter with extra sprinkles scattered around (kids love this!).
Pair with hot cocoa, spiced apple cider, or even a rich black tea—those citrus notes play nicely with warm drinks. If you’re serving at a party, consider topping each bar with a tiny Halloween candy or edible eyes for a whimsical look. Honestly, they’re festive enough on their own, but a little extra goes a long way!
For storage, keep bars in an airtight container in the refrigerator for up to 5 days. They freeze beautifully, too—just wrap tightly in plastic wrap and place in a freezer bag. Thaw overnight in the fridge before serving. If reheating, use a low oven (about 275°F/135°C) for 5-7 minutes; don’t microwave, as you’ll lose that lovely crust texture. Over time, the flavors mellow and meld, making day-two bars even tastier.
Nutritional Information & Benefits
Each bar (based on 16 servings) contains roughly 175 calories, 8g fat, 24g carbs, and 3g protein. The bright citrus flavor comes from real orange and lemon juice—both packed with vitamin C and antioxidants. Butter and eggs add richness, but you can lighten things up by using less sugar or a plant-based butter substitute.
This recipe is naturally nut-free and can be made gluten-free or dairy-free with easy swaps. If you’re watching sugar intake, try reducing the granulated sugar by 1/4 cup—the bars will still set, just slightly less sweet. Keep in mind the sprinkles may contain food dyes and allergens, so read labels carefully if you have sensitivities.
From my wellness perspective, these bars are a treat, not a staple, but the fresh citrus gives them a bright lift. They’re perfect for a festive occasion, and sharing makes them even sweeter!
Conclusion
If you’re searching for a dessert that delivers both flavor and fun, these orange Halloween lemon bars are the answer. They’re easy, festive, and downright delicious—exactly what you want for celebrating with friends or family. The best part? You can customize them however you like, from gluten-free to vegan to extra tangy.
I love this recipe because it brings out smiles every single time—whether it’s the cheerful colors, the comforting citrus aroma, or just the joy of baking something special for Halloween. If you make these bars, let me know how they turn out! Drop a comment below with your variations or tag me on social media with your creations.
Happy baking, and may your Halloween be filled with sweet treats and even sweeter memories!
FAQs
Can I use bottled orange and lemon juice instead of fresh?
Fresh juice is best for flavor and brightness, but bottled works in a pinch. Just avoid juices with added sugar or preservatives for the cleanest taste.
How do I prevent my lemon bars from getting soggy?
Bake the crust until golden before adding the filling. Also, cool bars completely before cutting and storing—they’ll hold their shape much better.
Can I double the recipe for a larger batch?
Absolutely! Use a 9×13-inch pan and double all ingredients. Adjust bake times: crust for 22-25 minutes, filling for 25-30 minutes.
Are these bars suitable for freezing?
Yes! Wrap individual bars in plastic and freeze for up to 2 months. Thaw in the fridge overnight before serving.
What kind of sprinkles work best for Halloween lemon bars?
Choose Halloween-themed sprinkles in orange, black, purple, or green. Jimmies, sugar pearls, or colored sanding sugar all look great—just make sure they’re labeled edible!
Pin This Recipe!
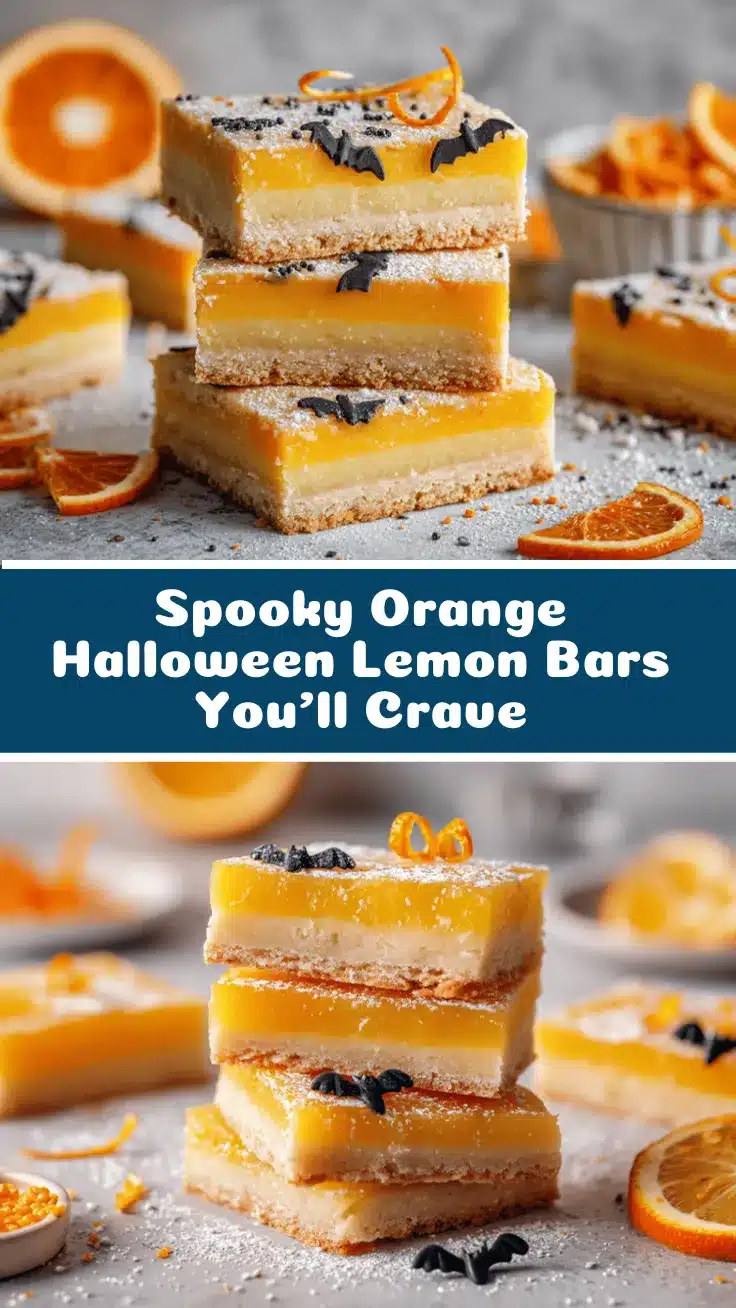
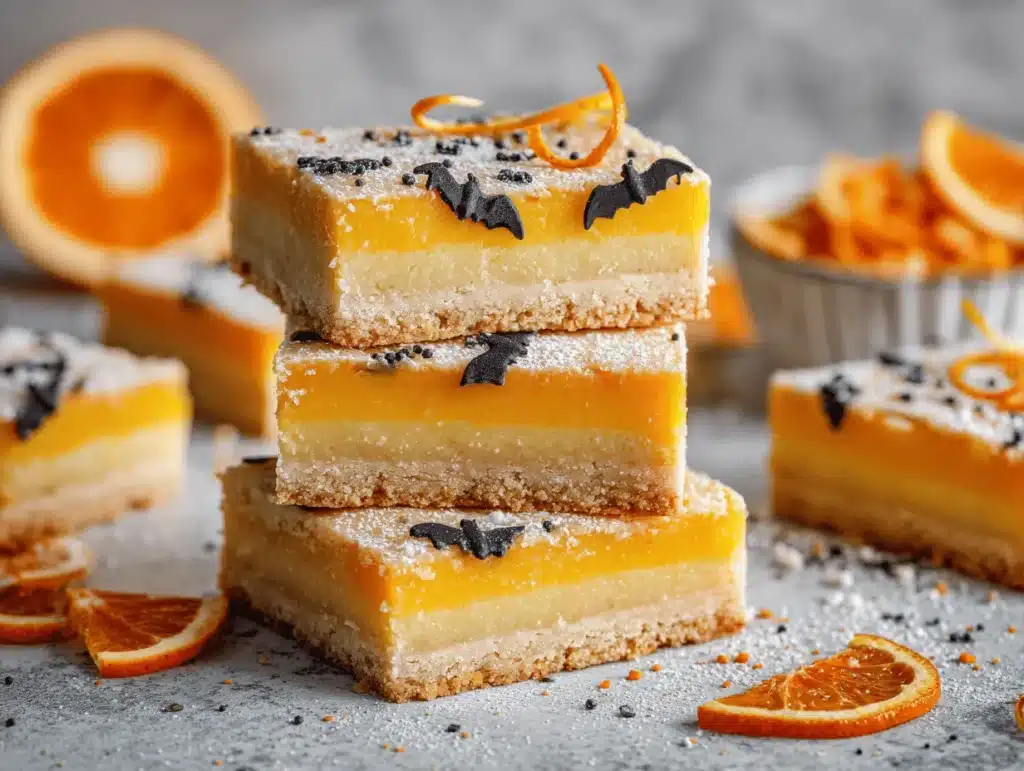
Orange Halloween Lemon Bars
- Total Time: 1 hour 15 minutes
- Yield: 16 bars 1x
Description
These festive lemon bars combine tangy lemon and sweet orange on a buttery shortbread crust, topped with Halloween sprinkles for a cheerful, crowd-pleasing treat. Perfect for parties, bake sales, or a fun family dessert.
Ingredients
- 1 1/2 cups all-purpose flour (for crust)
- 1/2 cup unsalted butter, softened
- 1/2 cup powdered sugar (for crust)
- 1/4 teaspoon salt
- Zest from 1 orange (for crust)
- 3 large eggs
- 1 cup granulated sugar
- 1/4 cup all-purpose flour (for filling)
- 1/4 cup fresh lemon juice
- 1/4 cup fresh orange juice
- Zest from 1 orange (for filling)
- Zest from 1 lemon (optional, for filling)
- A few drops orange food coloring (optional)
- 2–3 tablespoons Halloween-themed sprinkles
- Powdered sugar, for dusting (optional)
Instructions
- Preheat oven to 350°F (175°C). Line an 8×8-inch baking pan with parchment paper, leaving overhang for easy removal. Lightly grease if not using parchment.
- In a mixing bowl, combine 1 1/2 cups flour, 1/2 cup softened butter, 1/2 cup powdered sugar, 1/4 teaspoon salt, and zest from 1 orange. Mix until sandy but holds together when pressed. If too dry, add a teaspoon of cold water.
- Press crust mixture firmly into the bottom of the prepared pan, smoothing the top. Bake for 18-20 minutes, until edges are lightly golden and middle is set.
- While crust bakes, whisk 3 large eggs in a bowl until frothy. Add 1 cup granulated sugar, 1/4 cup flour, 1/4 cup lemon juice, 1/4 cup orange juice, zest from 1 orange and 1 lemon, and orange food coloring if using. Whisk until smooth and lump-free.
- Pour citrus filling over hot crust. Return pan to oven and bake for 20-25 minutes, until filling is just set and barely jiggles in the center.
- Let bars cool completely in the pan, about 1 hour at room temperature.
- Scatter Halloween sprinkles generously over cooled bars. Press gently so they stick. Dust with powdered sugar if desired.
- Lift bars from pan using parchment overhang. Cut into 16 squares or 12 rectangles. Wipe knife between cuts for clean edges. Serve with extra sprinkles if desired.
Notes
For gluten-free bars, substitute a 1:1 gluten-free flour blend in both crust and filling. Vegan options include plant-based butter and egg replacer. Zest citrus before juicing for best flavor. Wait until bars are fully cool before adding sprinkles to prevent color bleed. Bars freeze well for up to 2 months.
- Prep Time: 15 minutes
- Cook Time: 40 minutes
- Category: Dessert
- Cuisine: American
Nutrition
- Serving Size: 1 bar (1/16 of recipe)
- Calories: 175
- Sugar: 16
- Sodium: 70
- Fat: 8
- Saturated Fat: 5
- Carbohydrates: 24
- Fiber: 1
- Protein: 3
Keywords: Halloween, lemon bars, orange, citrus dessert, festive, easy, party, kid-friendly, sprinkles, shortbread