There’s something about the magic of Halloween that makes me giddy every single year. Maybe it’s the thrill of costumes, or maybe it’s the excuse to eat chocolate at any hour — but honestly, the smell of rich, melted chocolate swirling with colorful candies is enough to put a spell on anyone. The first time I whipped up a batch of Halloween chocolate bark, it was for my son’s classroom party. The kids went wild for it. I mean, how could they not? This easy Halloween chocolate bark recipe has become my secret weapon for parties, treat bags, and even those last-minute “Mom, I need something spooky for school!” moments.
What I love most about this recipe is how ridiculously simple it is. You don’t need fancy molds or a candy thermometer. If you’ve got chocolate chips and a handful of fun toppings, you’re golden. Every year, I tweak the toppings based on what’s lurking in my pantry — sometimes it’s googly candy eyes, other times it’s sprinkles shaped like bones or neon worms. No matter what, it always turns out creepy, colorful, and so much fun.
This Halloween chocolate bark recipe isn’t just about sugar rushes and festive looks. It’s a lifesaver for busy parents, party planners, and anyone who wants to add a little bit of spooky joy to their dessert table. Plus, it’s customizable for all ages and dietary needs. Trust me: after testing this recipe at least a dozen times, I can say with confidence — it’s foolproof. If you’re looking for an easy party treat for 2024, this chocolate bark will make you the MVP of every Halloween bash.
Why You’ll Love This Recipe
Over the years (and, let’s face it, a few chocolate disasters), I’ve learned a thing or two about what makes a Halloween chocolate bark recipe stand out from the rest. This one’s got my stamp of approval — and my kids’ sticky fingerprints, too.
- Quick & Easy: No oven, no fuss — this bark comes together in under 20 minutes. Perfect for parties or when you need something at the eleventh hour.
- Simple Ingredients: You probably have all the essentials at home. Chocolate chips, a bit of oil, and your favorite Halloween candies (think M&Ms, gummy worms, pretzels, or even orange sprinkles).
- Perfect for Parties: Whether it’s a school event, neighborhood bash, or movie night, this bark is a hit with kids and adults. It’s easy to break into pieces and share.
- Crowd-Pleaser: It’s got that wow factor — the creepy candy eyes and monster colors make everyone do a double-take.
- Unbelievably Delicious: The combo of sweet, salty, crunchy, and chewy is basically irresistible. One bite and you get why this is my go-to Halloween treat.
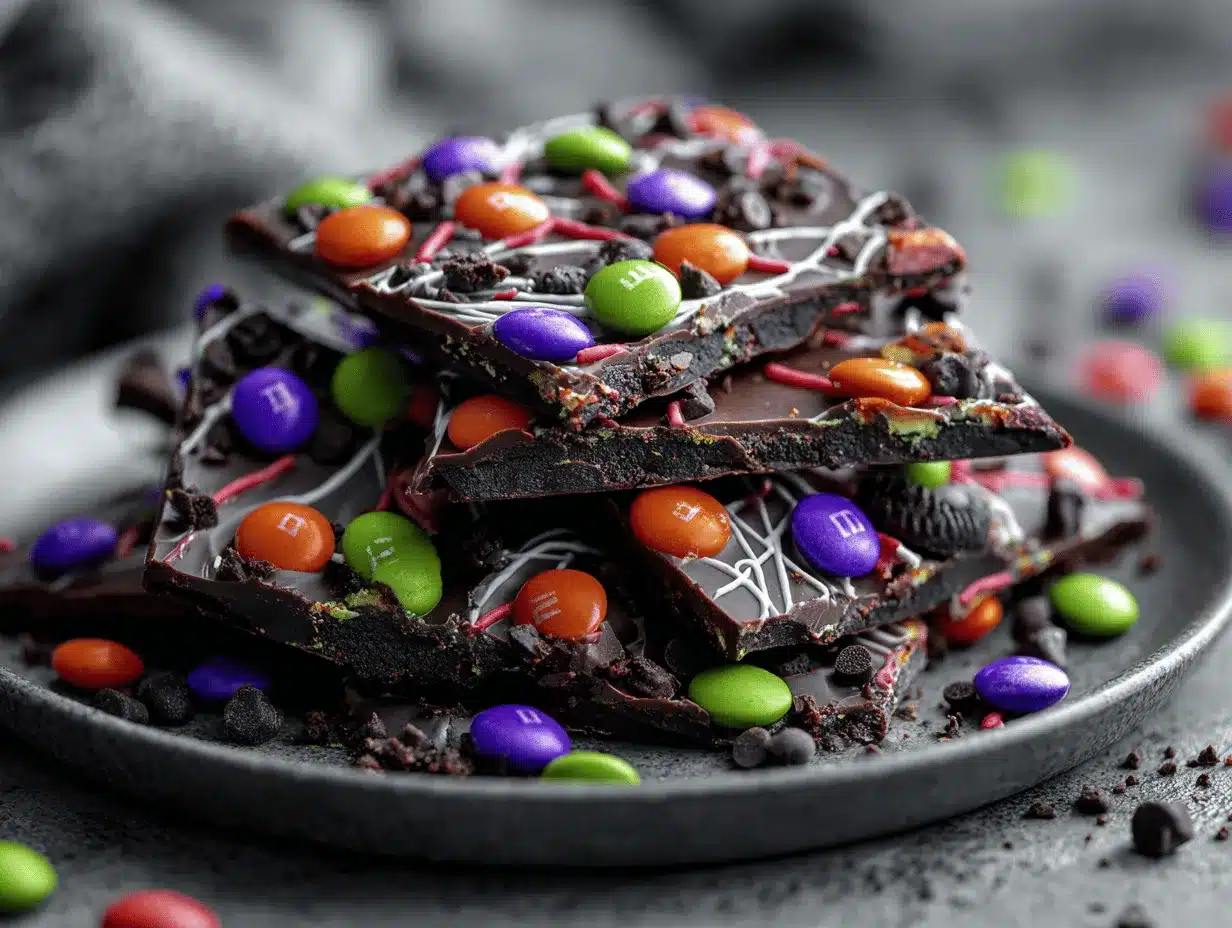
What really sets this recipe apart is the layering technique. Instead of just dumping everything on top, I swirl white and dark chocolate together, then strategically add toppings so every bite looks like a masterpiece. Sometimes I’ll add a drizzle of orange candy melts for that extra pop. And you know what? The texture is perfect — not too hard, not sticky, just right for little hands.
This Halloween chocolate bark recipe isn’t just another Pinterest idea. It’s a treat that brings people together. When you see someone’s face light up after spotting a gummy worm poking out of the chocolate, you know you nailed it. Honestly, it’s comfort food in disguise — a little bit of nostalgia, a lot of chocolate, and a whole lot of fun.
What Ingredients You Will Need
This Halloween chocolate bark recipe is all about using simple, accessible ingredients to create a dessert that’s festive, flavorful, and fun. Most of these items are pantry staples, and you can swap in whatever you have on hand.
- Chocolate Base:
- 2 cups (340g) semi-sweet chocolate chips (I love using Ghirardelli for a smooth melt)
- 1 cup (170g) white chocolate chips (for swirling and color contrast)
- 1 tablespoon (15ml) coconut oil or vegetable oil (helps create a glossy finish and easy-to-break texture)
- Halloween Toppings:
- 1/2 cup (80g) candy corn (classic and instantly festive)
- 1/3 cup (50g) mini pretzels, broken into pieces (salty crunch)
- 1/3 cup (50g) gummy worms or neon gummy snakes (for that creepy-crawly vibe)
- 1/4 cup (40g) candy eyeballs (the ultimate spooky touch)
- 1/4 cup (40g) orange and black sprinkles (adds color and crunch)
- 1/4 cup (40g) mini M&Ms (use Halloween colors if you can find them)
- 1/4 cup (40g) bone-shaped or skull-shaped sprinkles (optional, but super fun)
- 1/4 cup (40g) chopped roasted peanuts or pumpkin seeds (adds a nutty flavor, skip if allergies are a concern)
- Optional Colorful Drizzles:
- 1/4 cup (40g) orange candy melts (for extra flair)
- 1/4 cup (40g) purple or green candy melts (if you want to get extra spooky)
Tips for picking ingredients: Always check the chocolate for a smooth texture — some store brands can be a bit waxy (not my favorite). For toppings, go wild! Anything that screams Halloween or just makes you smile works here. If you need to go nut-free, swap the peanuts for more pretzels or seeds. Want it gluten-free? Use gluten-free pretzels and candies. Honestly, the best part is making it your own.
Equipment Needed
You don’t need a candy factory to make irresistible Halloween chocolate bark — just a few basic kitchen tools will do the trick.
- Baking sheet: A standard 13×9-inch (33x23cm) sheet works great. If you only have a smaller pan, just make a thicker bark.
- Parchment paper or wax paper: Essential for easy removal and cleanup. Don’t skip this, trust me — I’ve learned the hard way!
- Microwave-safe bowls: For melting chocolate and candy melts. Glass bowls work best and are easy to clean.
- Spatula or offset spatula: For spreading the melted chocolate evenly. You can use the back of a spoon if you don’t have a spatula.
- Toothpick or skewer: For swirling the chocolate layers (optional but so fun for kids).
- Measuring cups and spoons: Precision makes perfect bark.
If you’re on a budget, don’t worry — a simple baking sheet lined with parchment paper and a regular spoon gets the job done. Just keep those parchment sheets handy. I once tried skipping it and spent way too long scraping chocolate off metal. Lesson learned!
Preparation Method
-
Prepare your workspace: Line a baking sheet with parchment paper, making sure the paper hangs slightly over the edges for easy lifting later. Set out all your toppings in small bowls so you can work quickly.
Estimated time: 5 minutes. -
Melt the chocolate: In a microwave-safe bowl, add the semi-sweet chocolate chips and 1/2 tablespoon (7ml) coconut oil. Microwave in 30-second bursts, stirring well between each, until smooth and fully melted (usually takes about 1.5 to 2 minutes).
Troubleshooting: If the chocolate seizes, add a tiny bit more oil and stir gently. Don’t overheat — chocolate burns fast! -
Melt the white chocolate: In another bowl, combine white chocolate chips and remaining coconut oil. Microwave in 20-second bursts, stirring between each, until glossy and smooth (about 1 minute total).
Note: White chocolate melts quicker and can scorch, so watch closely. -
Spread the chocolate base: Pour the melted semi-sweet chocolate onto your lined baking sheet. Use a spatula to spread it into an even layer, roughly 1/4-inch (0.5cm) thick. Don’t worry if it’s not perfectly rectangular — bark is meant to be rustic.
Estimated time: 2 minutes. -
Swirl in the white chocolate: Drizzle the melted white chocolate over the semi-sweet layer in zigzags or dots. Use a toothpick or skewer to swirl the two chocolates together for a marbled, spooky effect.
Sensory cue: Look for ghostly swirls and fun patterns! -
Add the toppings: While the chocolate is still warm, quickly sprinkle on all your Halloween candies — candy corn, pretzels, gummy worms, candy eyeballs, sprinkles, and M&Ms. Press them gently so they stick.
Personal tip: Cluster toppings for visual impact, but leave some space for those dramatic colors to show through. -
Drizzle with colored candy melts (optional): If you want extra color, melt orange or purple candy melts and drizzle over the bark in thin lines.
Estimated time: 2 minutes. -
Set the bark: Transfer the baking sheet to the fridge for at least 30 minutes, or until the chocolate is completely hardened.
Sensory cue: The bark should feel firm to the touch and the candies shouldn’t move when pressed. -
Break into pieces: Once fully set, lift the bark out using the parchment paper. Use your hands or a sharp knife to break it into chunks (aim for 2-inch / 5cm pieces).
Troubleshooting: If it’s too hard to break, let it sit at room temperature for 5 minutes. If it’s too soft, chill a bit longer. -
Serve or store: Arrange on a platter or package in treat bags. If you’re not serving right away, keep in an airtight container in the fridge.
Estimated total time: 45 minutes (including chilling).
My personal tip for efficiency: Set up a little assembly line if you’re making a big batch. Let the kids go wild with toppings — it makes for great memories and truly unique bark every time.
Cooking Tips & Techniques
Halloween chocolate bark seems simple, but I’ve learned some tricks along the way that make it truly irresistible (and reliably easy).
- Chocolate melting method: Always melt chocolate slowly in short bursts. Rushed melting equals burnt chocolate — trust me, I’ve ruined a few batches.
- Use good-quality chocolate: It makes a difference. Bargain brands can be waxy and don’t set as well. If you want glossy bark, add a bit of coconut oil.
- Swirling technique: Don’t over-mix the chocolates. Gentle swirls with a toothpick create beautiful patterns, not muddy blobs.
- Work fast with toppings: Once the chocolate is spread, sprinkle toppings immediately so they stick. If you wait, the chocolate hardens and candies will slide off.
- Layering for texture: Group crunchy and chewy toppings for bites that surprise. I like to cluster gummy worms near candy eyes for a fun monster effect.
- Temperature matters: Set the bark in the fridge for a faster, firmer result. If your kitchen is warm, chill the pan before spreading the chocolate.
- Personal lesson: One year, I tried to make bark on a humid day without chilling — everything melted into a gooey mess. Now, I always use the fridge.
- Consistency: Uniform thickness leads to even pieces. Don’t spread too thin, or your bark will be brittle.
And here’s a multitasking tip: While the bark chills, get your treat bags or party platter ready. You’ll thank yourself when it’s time to serve!
Variations & Adaptations
One of the best things about Halloween chocolate bark is its flexibility. Seriously, you can customize it for almost any taste or dietary need — and I’ve tried plenty of variations!
- Gluten-free version: Swap regular pretzels for gluten-free pretzels, and check that all candies are safe for gluten-sensitive guests.
- Nut-free adaptation: Skip peanuts or pumpkin seeds. Use sunflower seeds or extra crunchy pretzels for texture.
- Vegan bark: Use dairy-free chocolate chips and vegan-friendly candies (like Enjoy Life chocolate and Surf Sweets gummies).
- Seasonal twist: For fall, add dried cranberries, chopped dried apricots, or cinnamon chips. For winter, use peppermint candies and snowflake sprinkles.
- Flavor boost: Add a sprinkle of flaky sea salt or drizzle with caramel for extra richness.
- Cooking method switch: If you don’t have a microwave, melt chocolate gently in a double boiler on the stovetop.
My personal favorite adaptation? Last year, I made a “zombie bark” with crushed Oreos, lime green candy melts, and loads of candy eyeballs. It was a hit at our neighborhood party (and honestly, looked creepier than anything else on the table).
Serving & Storage Suggestions
Halloween chocolate bark is best served chilled or at room temperature, depending on your climate. I love piling it onto a big platter, letting the colors and candy shapes shine — it makes a show-stopping centerpiece for any dessert table.
- Presentation: Break bark into uneven pieces for a rustic, “fractured” look. Arrange with extra candy eyeballs around the edges for maximum spookiness.
- Pairings: Serve with apple cider, hot cocoa, or coffee for adults. For kids, it’s awesome with orange soda or fruit punch.
- Storage: Keep leftovers in an airtight container in the fridge for up to 2 weeks. If you want to freeze, layer pieces between parchment paper and store in a zip-top bag for up to 2 months.
- Reheating: Bark doesn’t really need reheating, but if it gets too cold or hard, let it sit at room temperature for 10 minutes before serving.
- Flavor development: The flavors mellow after a day or two in the fridge, making the bark even more delicious as the candies soften slightly.
This treat travels well, so it’s perfect for school parties or gifting. Just be sure to keep it cool if you’re taking it out on a warm day!
Nutritional Information & Benefits
Here’s a general estimate for a serving (about 40g or a small handful): roughly 180 calories, 9g fat, 22g carbohydrates, 2g protein, and 16g sugar. These numbers will vary based on your toppings and chocolate choice.
The health benefits? Okay, it’s not kale — but dark chocolate contains antioxidants, and adding nuts or seeds can bump up the protein and mineral content. Using semi-sweet chocolate means you’re getting less sugar than milk chocolate. Plus, you can make it gluten-free, nut-free, or vegan as needed.
Allergen note: Watch for nuts, gluten in pretzels, and dairy in chocolate. Always check candy labels if allergies are a concern. Personally, I love knowing exactly what’s in my treats — and that I can adapt this recipe for my family’s needs, whether we’re craving something sweet or need a party-safe option.
Conclusion
Halloween chocolate bark is more than just a treat — it’s a ticket to spooky fun and chocolatey satisfaction for kids and grownups alike. It’s easy, customizable, and guaranteed to add excitement to any party. If you’re looking for an easy Halloween chocolate bark recipe for 2024, this one is as close to foolproof as it gets.
Feel free to mix up the toppings and flavors to suit your crowd. Whether you’re a chocolate lover, nut-free household, or just want something visually wild for your party spread, this bark lets you get creative (and a little messy — which is part of the fun!). I genuinely love making this every October, and it’s become a tradition for us.
Let me know below if you try this recipe, or have your own wild twist! Share your spookiest bark photos, swap topping ideas, or tell me your Halloween chocolate disasters — I promise you’re in good company. Happy haunting, and may your chocolate always melt just right!
FAQs
How far in advance can I make Halloween chocolate bark?
You can make the bark up to two weeks ahead if you store it in an airtight container in the fridge. It holds up beautifully and even tastes better after a day or two!
Can I use milk chocolate instead of semi-sweet?
Absolutely! Milk chocolate will make the bark sweeter and creamier. You can even mix dark and milk chocolates for a layered effect.
What’s the best way to melt chocolate without burning it?
Go slow — use 30-second microwave bursts and stir often. Or melt in a double boiler over gentle heat. Patience is key (I’ve burned more than I’d like to admit).
How do I make this recipe nut-free?
Just skip the peanuts or pumpkin seeds and stick with pretzels, seeds, and safe candies. Always check for cross-contamination warnings on chocolate and toppings.
Can I freeze Halloween chocolate bark?
Yes! Freeze pieces between parchment paper in a zip-top bag for up to two months. Thaw at room temperature before serving — it tastes just as delicious.
Pin This Recipe!
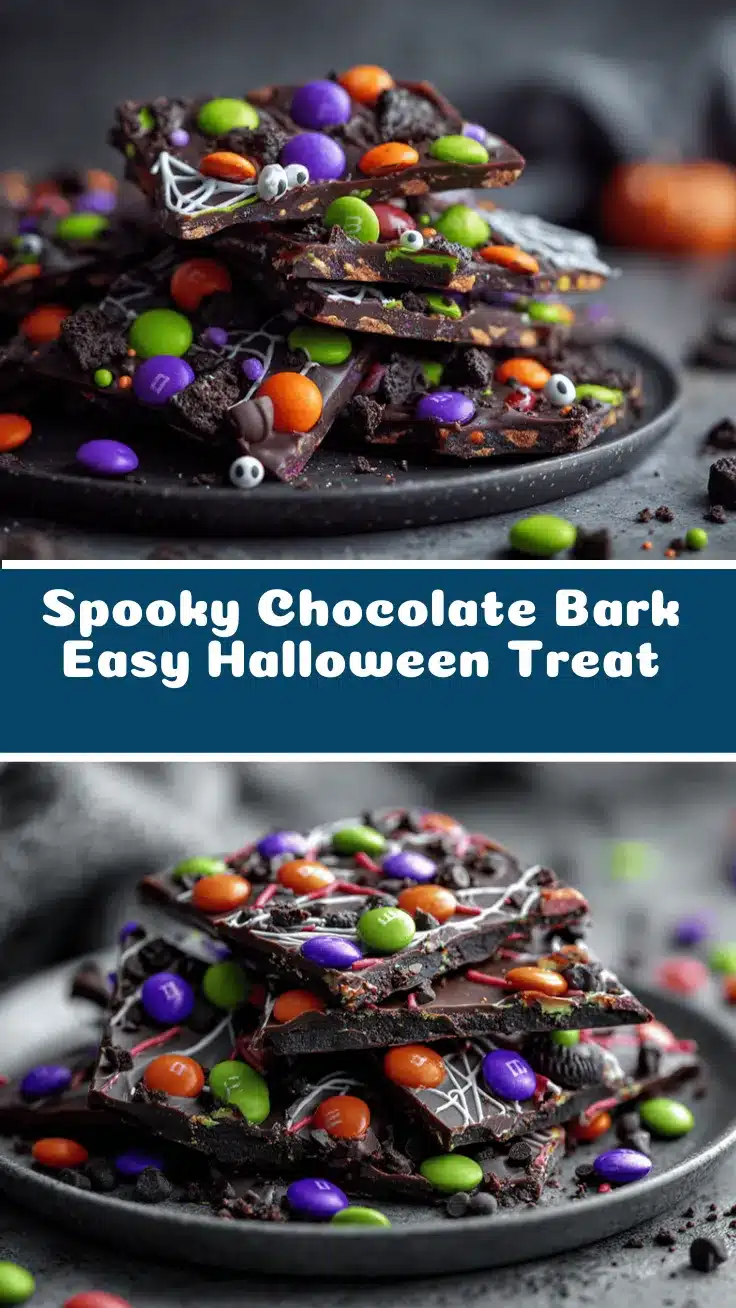
Halloween Chocolate Bark Recipe Easy Party Treats for 2024
- Total Time: 45 minutes
- Yield: 16 servings 1x
Description
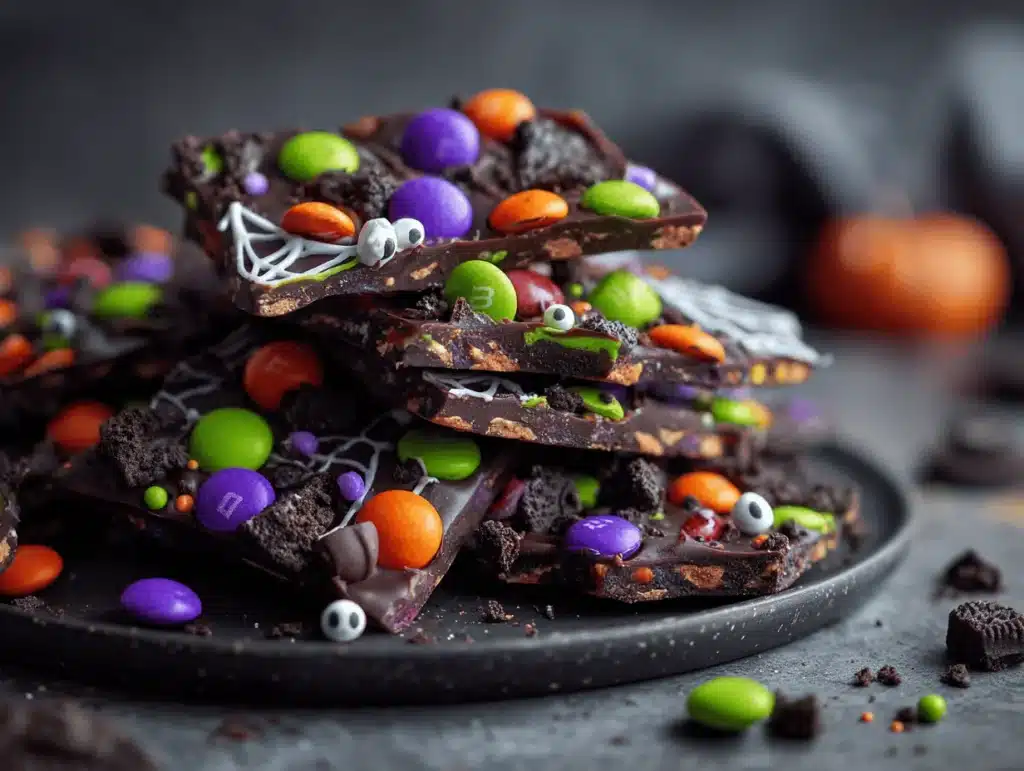
This easy Halloween chocolate bark is a festive, customizable treat packed with chocolate and colorful candies. Perfect for parties, treat bags, or last-minute spooky snacks, it’s quick to make and always a crowd-pleaser.
Ingredients
- 2 cups (12 oz) semi-sweet chocolate chips
- 1 cup (6 oz) white chocolate chips
- 1 tablespoon coconut oil or vegetable oil
- 1/2 cup candy corn
- 1/3 cup mini pretzels, broken into pieces
- 1/3 cup gummy worms or neon gummy snakes
- 1/4 cup candy eyeballs
- 1/4 cup orange and black sprinkles
- 1/4 cup mini M&Ms (preferably Halloween colors)
- 1/4 cup bone-shaped or skull-shaped sprinkles (optional)
- 1/4 cup chopped roasted peanuts or pumpkin seeds (optional, skip for nut-free)
- 1/4 cup orange candy melts (optional, for drizzle)
- 1/4 cup purple or green candy melts (optional, for drizzle)
Instructions
- Line a baking sheet with parchment paper, allowing the paper to hang over the edges for easy lifting. Prepare all toppings in small bowls.
- In a microwave-safe bowl, melt semi-sweet chocolate chips with 1/2 tablespoon coconut oil in 30-second bursts, stirring between each, until smooth (about 1.5 to 2 minutes).
- In another bowl, melt white chocolate chips with remaining coconut oil in 20-second bursts, stirring between each, until smooth (about 1 minute).
- Pour melted semi-sweet chocolate onto the lined baking sheet and spread into an even 1/4-inch thick layer.
- Drizzle melted white chocolate over the semi-sweet layer in zigzags or dots. Swirl together with a toothpick or skewer for a marbled effect.
- Quickly sprinkle all Halloween toppings (candy corn, pretzels, gummy worms, candy eyeballs, sprinkles, M&Ms, optional bone/skull sprinkles, peanuts or pumpkin seeds) over the warm chocolate. Press gently to adhere.
- If desired, melt colored candy melts and drizzle over the bark for extra color.
- Transfer baking sheet to the fridge for at least 30 minutes, or until chocolate is completely hardened.
- Lift bark out using parchment paper and break into 2-inch pieces by hand or with a sharp knife.
- Serve immediately or store in an airtight container in the fridge.
Notes
Use good-quality chocolate for best results. Work quickly with toppings so they stick before the chocolate hardens. For gluten-free, use gluten-free pretzels and candies. For nut-free, skip peanuts/pumpkin seeds. Bark can be made up to 2 weeks ahead and stored in the fridge. Freeze for up to 2 months between parchment layers.
- Prep Time: 10 minutes
- Cook Time: 5 minutes
- Category: Dessert
- Cuisine: American
Nutrition
- Serving Size: About 1 piece (40g)
- Calories: 180
- Sugar: 16
- Sodium: 60
- Fat: 9
- Saturated Fat: 5
- Carbohydrates: 22
- Fiber: 2
- Protein: 2
Keywords: Halloween, chocolate bark, party treats, easy dessert, kid-friendly, candy, spooky, festive, no bake, customizable